Showing posts with label PTU Tutorials. Show all posts
Showing posts with label PTU Tutorials. Show all posts
Sunday, June 3, 2012
 Dirty Rocker Girl -PTU
9:10 PM |


Can only be found at our forum under "Joanne's Tutorials"
Kit by Designs by Sarah "Dirty Rock Star"
Come join us!
Memberships approved almost immediately and no waiting to get access to our tutorials!

Tuesday, February 15, 2011
Blue Funk Forum Set - PTU Tutorial
3:01 PM |


Supplies needed:
Scrapkit of Choice
Tube of Choice
Eye Candy 4 - Gradient Glow
I'm using the PTU kit by Addictive Pleasures called "Blue Funk"
I'm using the artwork of Elias Chatzoudis.
My original license is with MPT however he is now with PTE.
You will need a license from PTE if you don't have one already.
Lets get started!
Open up a 550x250 blank image.
Floodfill with a color of choice.
Copy and past a paper of choice that compliments your color.
Position it to the right of your tag so that only 1/4 of it is showing.
Take your selection tool and trace the paper that is showing.
Go to Selections, hit invert then hit delete.
Now go back to Selections, hit Select All. Do not deselect.
Go back again to Selections, modify, Select selection borders.
Apply the following settings:

Make sure you still have the marching ants on this layer.
Create a new layer.
Floodfill the border selection with a color that compliments then hit ok.
Go to Adjust, Add/Remove Noise, Add Noise and apply the following settings:

On the bottom layer follow the same steps as above.
Create a new layer above the bottom layer.
Select all, modify, Select selection borders and apply the settings as above.
Use the same color you applied in the above steps.
Next, find a texture of choice and paste as a new layer.
I placed mine over the bottom layer.
On my layer palette I put my blend mode on hard light.
Choose a tube of choice and duplicate it a few times.
If following my example duplicate it 3 times.
Position your tubes accordingly.
Bring these layers below the textured layer.
Now apply the tube again and position it to where you like it.
Duplicate the tube.
On the 1st layer go to Adjust, Blur, Gaussian Blur, put it at 4 and hit ok.
On the top layer apply the following settings using Xero, Porcelain.

Go back to Xero but this time apply the Radience filter using these settings:

Now draw 2 rectangles on your tag (Refer to mine for placement)
Foreground nil and background a color that compliments your tag.
Once done convert this layer to a raster layer.
Apply the same noise settings as above.
I drew thin rectangles on each side to make it look like a border.
Take your pen tool and put the line style @ 4 using the diamond line style.
Make sure the pen tool is on Draw lines & Polylines and create it on a vector layer.
Draw out 2 lines on each rectangle.
Choose colors according to your tag.
You can add other elements of choice to your tag if you'd like.
Last step is to add a white border thick enough to add text.
Im using the font pixelette, size 8, Anti-Alias off.
Type out your phrase of choice.
Add your copyright info and don't forget to tag your work.
To create the avatar:
Open a 150x150 blank image.
Copy part of your tag and paste it.
I hit undo several times to get my unmerged layers.
I kept the first few layers, hid the rest and copy merged then pasted it.
I then pasted my original tube and positioned it to my liking.
Follow the same steps as above to create a border.
Use a color that matches.
To draw the dotted lines go to your preset shape tool and select rectangle
Put the line style diamond, color is foreground and background is nil.
For the names I choose a color of choice.
I use the noise settings as above.
For the gradient glow for all my text I use the following settings:


For future tags just change the second color.
Add a dropshadow of choice.
Hope this tutorial was easy enough to follow.
If you need any help then please let me know.

Tuesday, December 21, 2010
Pink Christmas - PTU Tutorial
4:48 PM |
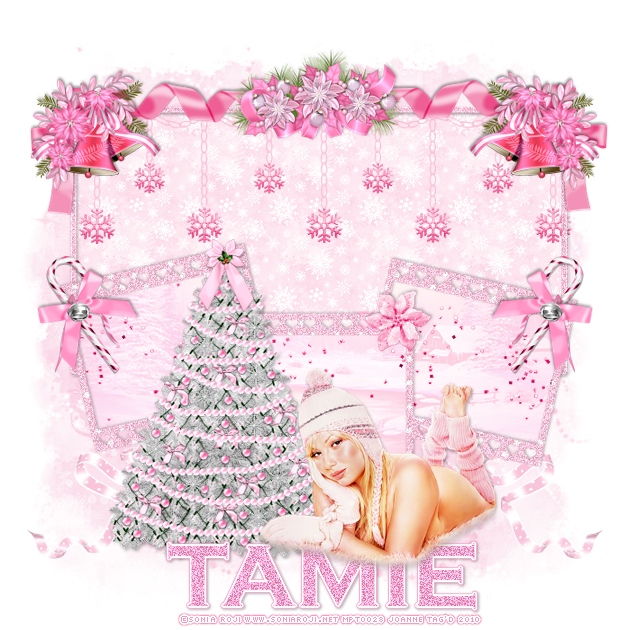
Supplies needed:
Tube of choice
Scrapkit by Addictive Pleasures
Font(s)
dsb flux
Mask of choice
Winter Image
Artwork by Sonia Roji.
You need a license to use her work which you can find here.
This tutorial will be explained using the PTU kit Pink Christmas.
You can find this gorgeous kit by Tamie here.
If you cannot use this kit then just use a kit that you like!
Lets get started!!
Open up a new image 700x700. Floodfill with white for now.
Go to your preset shape tool and select the Rectangle tool
Choose white for your background color and put x out the foreground.
Draw out a rectangle approximately 545 x 290.
While still on this layer go to selections, select all, float & defloat.
Now go to modify, select, selection borders and apply the following settings:
Tube of choice
Scrapkit by Addictive Pleasures
Font(s)
dsb flux
Mask of choice
Winter Image
Artwork by Sonia Roji.
You need a license to use her work which you can find here.
This tutorial will be explained using the PTU kit Pink Christmas.
You can find this gorgeous kit by Tamie here.
If you cannot use this kit then just use a kit that you like!
Lets get started!!
Open up a new image 700x700. Floodfill with white for now.
Go to your preset shape tool and select the Rectangle tool
Choose white for your background color and put x out the foreground.
Draw out a rectangle approximately 545 x 290.
While still on this layer go to selections, select all, float & defloat.
Now go to modify, select, selection borders and apply the following settings:

Hit ok but don't hit select not just yet.
Create a new layer first, hit effects and go to dsb flux.
Apply the following settings then hit ok.

Open up paper 6 and copy and paste as a new layer below the border of the above frame.
Take your magic wand and click on the white rectangle then hit invert.
Go back to your paper layer and hit delete.
Next, open up the pink filmstrip and resize it by approx 85%.
Copy and paste as a new layer.
Now go to effects, dsb flux and apply the following settings then hit ok.
Position the frame accordingly or refer to my tag for placement.
Take your magic wand, click inside each frame while holding the ctrl key down.
Create a new layer below the frame and floodfill with a matching color.
Under selections hit invert then hit the delete key. Select none
Now find a winter themed image (there's alot of free stock images you can google)
Place it below the pink filmstrip layer.
Take your magic wand and hold down the ctrl key.
Click inside each frame and then go to selections, modify and expand by 3.
On your image layer go back to selections, hit invert then delete. Select none.
While on this layer go to the layer palette and change the blend mode to overlay.
Open up tree3 and resize it by approximately 50%
Copy and paste as a new layer.
Position to to the left of your tag.
I took various other elements and resized them accordingly to fit my tag.
Dropshadows added were 2, -1, 45, 5, black. You can vary these settings.
For the mask layer find a mask that you like.
Choose a complimentary paper and place it just above the white background.
Once done, don't forget to merge group in your layer palette.
For my font I used Copperplate Gothic. Size can vary.
Choose a complimentary color and type out your name.
Next use the same noise settings as above and hit ok.
Now go to Eye Candy 4000, gradient glow and use the following settings:


Add a dropshadow of choice and thats it!
Delete your white background layer and save as a .png file.
If you have any questions, feel free to leave a comment.
Hope you enjoyed this tutorial!

Sunday, July 25, 2010
Summer Fun - PTU Tutorial
7:04 PM |

Scrapkit used: Orange Crush Taggers Kit
Eye Candy 4000 - Gradient Glow
Masks
2 Font(s) of choice
I'll be using Orange Crush which is a PTU kit
You can find it here along with some other great kits by Missy!
Open a new 700x700 image.
Floodfill with white for now.
Open up Crush_Frame2.png and resize it by 60% or so.
Copy and paste as a new layer.
Open up Crush_Paper12.jpg and resize it by 70% or so.
Copy and paste as a new layer and put it below the frame.
Go to layers, load/save mask & load mask from disk.
I'm using the mask Vix_mask190 which you can find here.
Use the settings:
Source luminance
Fit to layer
Invert transparency unchecked
Hide all mask is checked
Hit load.
In your layer palette right click and merge group.
Open up Crush_Paper7.jpg and resize it by 60%.
Copy and paste as a new layer and bring it below the frame layer.
Open up Crush_ButterfliesSwirl.png and resize it by 60% or so.
Copy and paste as a new layer below the mask layer.
Position it to your liking..you can refer to my tag for placement.
Duplicate this layer, mirror and then flip it.
Again, position it to your liking.
Next, open up Crush_BowRibbon2.png and resize it by 50% or so.
Copy and paste as a new layer.
Place it above the frame layer.
Add a dropshadow of 2, 0, 44, 5 & black. Hit ok.
Now open up the Crush_RibbonStaple2.png and resize it by 20%.
Copy and paste as a new layer and position it above the curled ribbon.
Add the same dropshadow as above.
Open up Crush_Paper11.jpg and resize it approx 80%.
Copy and paste as a new layer and place it at the bottom of your layers.
Go back to layers, load/save mask and load mask from disk.
Use the above mask settings except change your mask to Vix_Mask327.
You can find these masks here.
For the word summerfun, I used the font impact, size 72.
Choose 2 colors from your tag.
Add a gradient glow using Eye Candy 4000.
Apply a fat white glow then apply another one using 2 colors from your tag.
Add a dropshadow.
For the name I used Buffet Script, size 72 with only a dropshadow.
I resized the bubbles element and placed them on each side of the text.
Finally open up your tube of choice.
I'm using the artwork of Jose Cano.
You need a license to use his work which you can find here.
Resize the tube to your liking and place it behind your text.
Add a dropshadow of choice and don't forget to tag your work.
And thats it!!
Wow its been too long and I hope the tutorial was easy enough to follow.

Subscribe to:
Posts (Atom)
My Blinkie

I create for:


